Wednesday, March 30, 2011

Creamy Pasta with Shrimp and Basil

It was recently called to my attention that this month I have posted only vegetarian recipes.  For fear that I, too, have given up meat (sorry, fam) it was suggested I balance out the posts.  This post is in honor of the lovely crustacean, shrimp.

After a long week in school, I needed a great glass of wine, amazing company and delicious food. So, I got the girls, (yes, law school girls do more than just study) opened up a bottle of wine and got to cooking with these beautiful ladies.  We made an amazing creamy pasta, a delicious salad and some wonderful appetizers.  The pasta, while creamy, is low on the calories, thanks to Hannah's ingenious tip--try using soy milk instead of regular milk for creaminess and less fat and calories!  It was wonderful.

What you'll need:
1 package pasta (linguine or spaghetti) 
Shrimp
1 cup soy milk (any other type of milk can substitute)
1 tablespoon flour
1/2 teaspoon dijon mustard
1/2 cup Parmesan cheese (or more if you like cheese)
basil
1 tablespoon olive oil
2 chopped garlic cloves
s+p

First, start by making a snack! (Toasted baguette with garlic, olive oil, bruschetta, brie and basil)
Next, make a salad and try this combination for an unusual and new version: butter lettuce, candied pecans, brie, dried cranberries and a spicy dijon mustard dressing
Now, down to the real cooking.  If you have frozen shrimp, run them under cold water to de-thaw them.  If you have an awesome friend that's willing to pick up fresh shrimp, go on and de-shell them!
Next, boil the pasta and begin making a roux:
Combine 1/2 cup soy milk and flour in a pan, stirring with a whisk (or fork if you don't have a whisk) until  blended. 
Place pan over medium heat; and slowly stir in remaining 1/2 cup milk. Stir in mustard and a little bit of salt and pepper. 
Bring to a boil but then reduce the heat to low, and cook 5 minutes or until the mixture begins to thicken.  Stir frequently so it doesn't burn/stick/do something else you don't want in your pasta.
 (That's Hannah with her soy milk trick!)
When the roux is on the low heat, put some olive oil in a different pan, about 1 tablespoon.  Add a little bit of chopped garlic when the oil is hot.  Add the shrimp.  The shrimp will cook fast--it only takes a few minutes for them to turn opaque! (That's how you know they're done)
Pink and delicious!
Next, add the finished creamy roux to the pasta
Add parmesan--lots of it!  Also, add some more salt and pepper
Add the shrimp, and basil and top with more parmesan
Then, sit at the table like a civilized person--don't eat out of the pot--and enjoy an awesome glass of wine, some good company and some delicious food.
Enjoy!!

Side Note: I've added a "gadget" to the side of the blog to highlight some of the useful things I have in my kitchen.  Some of them are unusual ingredients I like, and some are just helpful, pretty cheap, gadgets I have around that make cooking a lot easier or faster.

Sunday, March 27, 2011

Spicy Tomato Jam

I stumbled upon this recipe a few months ago when I had some extra tomatoes (yes, I know, that seems to be a common occurrence around here).  I had some friends coming over and thought I could make some sort of appetizer with these tomatoes.  Without really thinking about it, I threw them into a pot with tomato sauce basics-olive oil, vinegar, garlic, red pepper flakes and some salt and pepper and let it simmer slowly while I prepared the rest of the meal.  I let it pass the time frame where I could peel and blend them into some sort of dip, and even let them pass the tomato sauce stage, letting them sit there, gently releasing all of their sticky sweetness until the concoction turned into this intensely tomato-y flavored, spicy jam-like consistency.  It was phenomenal on top of some crusty bread and soft, thickly cut, cloud-like mozzarella. Please, if you have a carton of tomatoes in your fridge, throw them into a pot ASAP and try and stop yourself from licking the bowl and ruining your appetite!

What you'll need:
1 carton tomatoes
2 tablespoons vinegar (balsamic or red wine)
2-3 tablespoons extra virgin olive oil
red pepper flakes (as much or as little as you like to make it spicy)
s+p

Start by putting the carton of tomatoes into a pot with all of the ingredients
 
 
 Let the tomatoes simmer on low heat until they start to release their juices.  You can help this along by using a wooden spoon to smash the tomatoes a bit.
Keep an eye on the pot and stir every couple of minutes so the tomatoes don't stick to the bottom of the pot.  If it seems like they are, add some olive oil
 
After about 30-40 minutes, the jam will be totally done.  You'll know it's ready when its thick enough to smear on bread like jam!
Serve immediately and enjoy!!

Tuesday, March 22, 2011

Braised Celery: the unsung vegetable hero

In honor of St.Paddy's day, I had some friends over for a pot-luck style dinner.  I had made guinness braised short ribs and seared red cabbage (posts coming soon) but had an hour to kill before people came over.  Apartment was cleaned, food was cooked--what to do?  I figured I could cook one more side dish to pass the hour but had no idea what to cook.  I was exhausted so didn't want to run out for more groceries, and didn't have much in my fridge.  Except...celery?  I had a HUGE bunch of celery in my fridge because I cooked the meat with a bit of celery and it was very likely it would go bad if I didn't use it.  But who even eats celery?  Should I serve it as crudite?  I did a quick google search and realized that there were a lot of recipes for braised celery.  I thought that sounded a bit weird but couldn't hurt to try and I am glad I did.  
This is my version of braised celery and it was surprisingly delicious.  With the slow cooking, the celery became soft and sweet and took on the flavor of butter and shallots.  It was pretty glorious, let me tell ya.  So, if you have some leftover celery and are bored and want to try something new, check this out.  Or, if you happen to love celery to begin with, try it this way because it'll show you a whole new side of this under-rated veggie!

What you'll need:
1 bunch celery
1/2 shallot
2-3 tablespoons of butter
1/2 cup chicken or vegetable stock

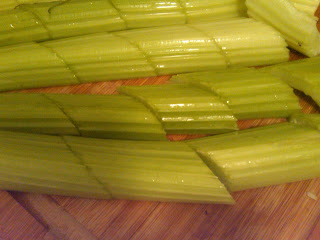
Start by cleaning the celery, chopping both ends off and cutting the stalks into 1 inch pieces, on the bias. 
Next, finely shop the shallot

Put the shallot into a pot with 1 tablespoon of butter and quickly saute until the shallot turns opaque and your kitchen smells lovely
Then, add the celery, another tablespoon of butter and salt and pepper
 
Add a few glugs of stock 

Let the celery cook, covered, for about 45 minutes, stirring occasionally.  If it looks like it's too dry, add another tablespoon of butter or a little bit more stock.  At the end of 45 minutes, the celery should be just lusciously soft and buttery.  Serve with a hearty main dish and enjoy!
 
Side Note: Many recipes suggest going over the celery with a vegetable peeler to get rid of the fibrous pieces.  I found that after 45 minutes, the fiber was soft and this step was unnecessary but if you need to cook this faster, using the vegetable peeler might speed the cooking process along.

Wednesday, March 16, 2011

Lime, Honey & Sriracha Brussel Sprouts

I never knew I liked brussel sprouts until I had them at Momofuku noodle bar in the east village.  Dressed up in all sorts of goodness, the dish had me thinking about brussel sprouts all week.  How weird, you're thinking, right?  Well try this recipe and tell me if these little buggers don't have you daydreaming about them until you can get your next fix.

What you'll need:
1 pound brussel sprouts
2 tablespoons honey
Juice from 2 limes
2 tablespoons sriracha (less if you don't like spicy)
1 tablespoon toasted sesame oil/canola oil for sauce, 1 additional tablespoon of canola oil for roasting
1 tablespoon fish sauce (optional, but preferable if you have it on hand...and if you don't have it on hand, try finding this stuff, it's a great thing to have in the pantry!)
1 tablespoon soy sauce

Begin  by preheating the oven to 400 degrees.
Wash the brussels sprouts, and trim them if needed.
Cut into half and place cut side down on a pan
Pour one of the tablespoons
 of canola oil over the brussel sprouts and place into the oven for 10 minutes
While the sprouts are in the oven, mix together sauce ingredients
After ten minutes, pull out the sprouts and drizzle the sauce over the sprouts, lightly coating them but making sure there is not much excess in the pan or it will burn.  Then place the sprouts back in the oven for another ten minutes.

Take them out and toss with remaining sauce.
The sprouts will be salty and sweet and caramelized with a kick at the end.  You will probably find yourself without any leftovers and with a horrifying addiction to brussel sprouts about five minutes later.
Enjoy!

Wednesday, March 9, 2011

Bean Salad: Straub's Wannabe

Here's a quick recipe for an easy, delicious and refreshing bean salad first found at Straub's in St. Louis.

What you'll need:
1 can of white beans
Juice of 1 lemon
Dill, finely chopped (add more or less depending on how much you like dill!)
1/4 fresh red pepper, finely chopped
1/4 yellow onion, finely chopped
1 tablespoon Olive Oil
Salt and Pepper

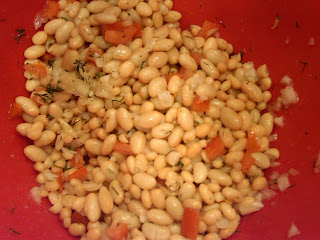
First, rinse off the beans.  Then, add the rest of the ingredients, with the salt and pepper to taste.  This is a wonderful salad to have around and snack on.  It keeps in the fridge for a few days, but I guarantee you won't have it around for that long!
Enjoy!

Tuesday, March 1, 2011

KFC-Style Potato Wedges

Oh man, do I love french fries.  I think that is the one thing in the world that I simply cannot stop eating if it's in front of me.  I also think I've already told you all that before when I made polenta fries--I guess I can't express enough how much I love these things!  Sorry about that!

Today's post is about fast food made easy because my real downfall is fast food french fries.  I just LOVE McDonald's fries and Wendy's fries that bring back memories of late night drives to Greenvale to indulge after a long night in high school =)  I  especially love those crispy, fat fries from KFC.  Seeing as I don't really have many of those places around me here (probably a good thing) I tried to recreate them in my kitchen and they came out pretty delicious and definitely healthier because I baked them.  The secret to these fries is paprika.  I don't know much about spices and I use regular grocery store brand for most of them, but I happen to have some special Spanish smoked hot paprika, and I think it really made the difference.  So if you can, get some good smoked paprika, and it'll make some normal dishes a total stand-out.

Also, this dish is completely easy to throw together and only needs a few ingredients, perfect for throwing into the oven while reading a case or two!
What you'll need:
1 potato per person
Olive Oil
Salt+Pepper
Paprika (preferably Smoked/Hot)

Preheat the oven to 400
Cut each potato in half length-wise, and then each half into thirds so you have wedges

Toss with olive oil, salt, pepper and paprika
Make sure they are coated in oil so nothing burns, but also make sure they are not swimming in the oil otherwise they won't crisp as nicely
 
Place them in the oven and check on them after fifteen minutes
Make sure none of the potatoes are sticking by giving the pan a quick toss
The crunchy side of the potatoes (I never knew this before!) really come from the part that is touching the pan, so toss them, but let the potatoes stay on the same side so they get really crispy

Put the potatoes back into the oven for another 10 minutes
If they aren't as crispy as you'd like, keep them in there for another 5-10 minutes, or turn on the broiler for a few minutes, keeping an eye on them so they don't burn
When they're done, they'll be crispy on the outside, soft on the inside and the paprika will have given them that spicy deliciousness that makes KFC wedge fries SO addicting
This is perfect with some flank steak and chard!
 Enjoy!