Friday, July 8, 2011

Tasty Dumpling Review

For those who know me, it will come as no shock that I am blogging today about a place called Tasty Dumpling.  In fact, it's a shocker that it's taken me this long to blab about how much I love Chinese food in general.  After enjoying something just so delicious today, I just felt it was time to let everyone in on what I have been enjoying so much.  While I live uptown, I have an internship this summer that lands me right next to Chinatown 3 days a week.  This is heaven for me.  While I'd love to go out for a Chinese feast every day, adventure and frugality has led me to some cheaper, and very tasty restaurants, kiosks and hole in the walls that really have pleasantly surprised me.  
I really like dumplings, so when I saw a hole in the wall called "Tasty Dumpling" right by my office, (located at 54 Mulberry St, between Mosco & Bayard) I had to try it.  Unfortunately, when I went for the first time, the dumplings really were not good.  In fact, I don't think I even finished my 5 for $1.25 portion which has never happened in my life.  I don't know what made me go back a second time, but I think I was somewhat intrigued by the other items on its rather limited menu.  On this second trip, I decided to try the pork and cabbage pancake.  I assumed it would be something like pork and cabbage sandwiched between two scallion pancakes, but I was willing to eat pork, cabbage and pancake in any combination.  What came out surprised me, as I had never seen anything like it before, even after a summer studying in Beijing.  It looked like a disc with a  flat, chewy, golden, almost english-muffin like exterior, stuffed with onion-y, moist ground pork and cabbage.  Oh my.  It was fantastic.  And $1.50.  How can you beat that?  So, if you're downtown and need a very quick and very cheap bite (and you're not near Prosperity Dumplings on Eldridge Street) head on over to Tasty Dumplings for some porky goodness. 

Wednesday, July 6, 2011

Seared Corn and Feta Salad with Cilantro-Lime Vinaigrette

This salad doesn't need much introduction other than it is a really delicious, light and refreshing summer meal.  It is perfect to bring to a bbq, and it has way more complex flavor than you'd expect from just a few ingredients.  Have you ever seared corn?  Well, searing the corn gives it a smoky taste, turning it into an almost popcorn-like flavor.  The light dressing adds a tang and sweetness, and the feta adds some saltiness.  Tomatoes and onion round out the dish and just make it really, really yummy.

What you'll need:
Corn and Feta Salad
3 cobs of corn
1/2-1 cup crumbled feta
1/2 chopped red onion
1/2 pint grape tomatoes, sliced lengthwise

Cilantro Lime Vinaigrette
1 cup loosely packed cilantro
2 garlic cloves
1/4 cup lime juice
1 tablespoon red wine vinegar
1 heaping tablespoon honey
salt+pepper to taste
1/2 cup canola oil

Boil the corn for about 4 minutes in salty water.  This will slightly under cook the corn but you will be finishing it off in a pan so this is the goal.  While the corn is boiling, put the vinaigrette ingredients, minus the oil in a food processor or vitamix.  Pulse a few times, and then pour in the oil slowly while mixing.  This will create a very pleasing light green dressing that is sweet, tangy and light.  
 
 When the corn is done, carve the corn off of the cob, season it with salt and pepper and begin heating 2-3 tablespoons of oil in a cast iron or non non-stick pan.  When the oil is hot, and nearly smoking, put the corn in the pan.  Place a cover partially over the top of the pan so as to not hurt yourself because these corn kernels will pop.  And they hurt, too.  Don't touch the corn for about a minute or so so it browns on one side, and then (very carefully) take a spatula and flip the kernels.  The corn is done when it is slightly brown on each side.
 
Toss the corn, feta, onions, tomatoes and dressing together while warm and serve.  The salad tastes just as good the next day, cold, from the fridge.  
Enjoy!

Sunday, June 26, 2011

Buffalo Southwest Salad with Homemade (light-er) Blue Cheese Dressing

If you know me, you know I love buffalo wings and am kind of a sucker for anything "buffalo."  But, ya can't have buffalo wings every day so buffalo salad makes a perfectly fine substitute.  Pretending it's healthy with that lettuce, its really just buffalo on crack, with crispy buffalo chicken, blue cheese dressing on top of crumbled blue cheese, with buttery avocado, bright and tangy tomatoes and sweet corn.  Nope, it is not the healthiest, but it is a touch better for you than being totally fried and swapping greek yogurt for sour cream in the dressing is a nice touch that lightens it up and adds a great tang.  I made this back at home for my fam and everyone ate a HUGE bowl's worth of this salad.  EVEN my meat-loving carnivorous brother ate it all AND enjoyed it.  Now, that is a successful dinner. 

Homemade (lighter) Blue Cheese Dressing
What You'll Need (makes about 3 cups)
3/4 cup 0% or 2% Greek Yogurt
1 cup mayo
1 teaspoon Worcestershire sauce
1/2 teaspoon dry mustard
1/2 teaspoon garlic powder
1 teaspoon salt
1 teaspoon ground black pepper
4 ounces crumbled blue cheese
Simply mix and let sit while you prepare the salad to let the flavors meld.  The dressing will stay good in an airtight container in your fridge for over a week and is great on sandwiches, salads and as a veggie dip.  
 
Buffalo Southwest Salad
What You'll Need (serves 5)
4 ounces crumbled blue cheese (or enough to sprinkle on 5 salads)
3 heads of romaine lettuce, chopped and cleaned
3 cobs of corn, boiled in salted water for 5 minutes and de-cobbed
1 pint cherry tomatoes. sliced lengthwise
2 avocados, cubed
1 pound chicken breast, cubed (or tofu, cubed for the vegetarians)
Panko bread crumbs
2 eggs
Buffalo Sauce (you can use any brand you like, "Frank's" brand is generally good)

Begin by preheating the oven to 400 degrees.  Set up a "dredging station" by beating the two eggs, and placing next to a plate of panko bread crumbs.  Season the eggs with salt, pepper and a dash of the hot sauce.  Coat the chicken in egg, then cover in panko, and then place in a roasting pan.  Roast for about 10-15 minutes, tossing once.  The chicken should be cooked through (not pink on the inside) and somewhat golden.  
While the chicken is cooking, assembled the salad by placing lettuce on bottom, and the corn, tomatoes, blue cheese and avocado on top in amounts and variations requested by picky eaters.
When the chicken is done, toss with buffalo sauce while warm and place on top of the salads.
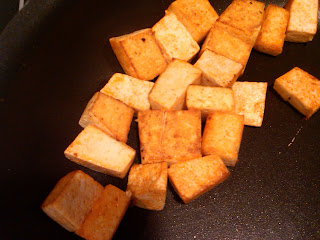
Got a vegetarian in the house?  Drain and pat dry tofu.  Spray a pan with pam and pan fry over medium heat until the tofu is golden.  Toss with buffalo sauce and place on top of the salad.
Serve with the blue cheese dressing and enjoy.  Seriously, sit outside with this salad and a cold beer.  While not as messy as wings, this is almost as satisfying and a great and easy weekday meal. 

Monday, June 20, 2011

Pepperoni Pizza Puffs

I saw these on a blog way back when and they have just been waiting on my little to-do recipe list for the right moment to make them.  These babies are like little pizza pockets, but without the preservatives (which is justification in itself to eat an entire pan).  They are SO good--probably because I am obsessed with pizza--but if you like your food mini, and you enjoy cheese, bread, pepperoni and sauce, I don't see why you wouldn't love these as well.  They are the best kind of appetizer to serve at a party because they are homemade, SO easy to make, and who doesn't like pizza?  Besides, you probably have most of these ingredients in your pantry anyway except, maybe the mini muffin pan.  In which case, you can get them for about 10 dollars on amazon, and I say go for it.
adapted from Noble Pig
What you'll need:
1 mini muffin tin with 24 cups
3/4 cup flour
3/4 teaspoon baking powder
3/4 cup whole milk
1 egg, lightly beaten
1 cup shredded mozzarella cheese
1 cup chopped pepperoni (I used turkey pepperoni and I couldn't tell the difference!)
1/2 cup pizza sauce or any type of marinara sauce

Preheat oven to 375o and grease your 24-cup mini muffin pan with Pam--make sure everything is Pam-ed or they'll stick! 
In a large bowl, whisk together the flour and baking powder.  Then whisk in the milk and egg.  
 Stir in the mozzarella and pepperoni and let stand for 10 minutes.
***As a side note, these are easily made vegetarian by leaving out the pepperoni altogether or until after you've poured half the batter into the muffin pan, making a batch of 12 for both the meat and leaf-eaters.

Stir the batter and fill the muffin pan.  The batter should come almost to the top.  Bake about 20 to 25 minutes until the little puffs are golden.  Heat up a little sauce and serve on the side.  If you have basil on hand, sprinkle on top.  Serve while hot and enjoy!

Thursday, June 2, 2011

Garlic Roasted Mushrooms

This is a take on Smitten Kitchen's Garlic Butter Roasted Mushrooms.  I LOVE mushrooms so this is perfect for me, but really--how can you go wrong with garlic and butter on anything?  It's a quickie, and perfect for a party, or even just for snacking while you're cooking dinner!


What you'll need:
White Button Mushrooms
Garlic Cloves
Butter (enough to put small pats on each mushroom)
Lemon Juice (a few tablespoons)
Parsley (a few tablespoons)
Clean and de-stem white button mushrooms.  Finely chop garlic and put a bit inside each mushroom.  Place small pats of butter on each mushroom/throughout the pan and then roast at 450 for 15-20 minutes until cooked through.
When they're done, drizzle lemon juice over the mushrooms and sprinkle with parsley.  Put a toothpick in each mushroom to serve at a party, or serve with crusty bread to mop up the buttery, garlicky sauce.  Enjoy!

Wednesday, June 1, 2011

Mushroom'ed Polenta with Farmer's Cheese, Roasted Tomatoes and a Poached Egg

I first saw this recipe years ago on the cover of Bon Appetit magazine and have been wanting to make it ever since.  I had no idea what "farmer's cheese" was but it sure looked good, so when I saw it in my local grocery store for the first time, I knew it was time to make this.  This recipe take FOR-EV-ER so do it when you have some time and can study or read a book by the stove.  Because ya know what?  The "fast" recipes I found to make polenta didn't work so well, and I had to do it the old fashioned way--stirring very, very often (or you can outsource the dirty work to willing family members).

What you'll need:
1 cup course ground cornmeal (polenta)
6 cups vegetable or chicken stock
1/2 pound any type of mushrooms
tomatoes (optional)
1 egg/person
1/4 pound farmers cheese
(serves about 4 for an entree)

Start by heating up the stock and then pouring the polenta in slowly and then STIR STIR STIR--do not let it get lumpy!  (dad helped out with that stirring!)  You can let it be for a few minutes at a time, but check on it frequently so it doesn't stick to the bottom or sides of your pan.

While the polenta is cooking, roast some tomatoes by cutting whatever type of tomatoes you like, drizzling olive oil on them and letting them hang out in the oven at 350 until everything else is ready.
Then, put the mushrooms in a pan on low heat, covered, until they are cooked through and have released their juices.

The polenta is done when it doesn't stick to the edges of the pan anymore.  This took me about an hour and fifteen minutes.  When done, add in the mushrooms and mix and then pour the polenta into bowls.
Top with crumbled farmer's cheese (turns out farmer's cheese tastes like mild goat cheese and is FABULOUS)

Add roasted tomatoes

Top with a poached egg!  If you are intimidated by poaching eggs, check out this helpful how-to video.  http://www.chow.com/food-news/53820/poach-an-egg/


The yolk will ooze out and mix with the tangy cheese and sweet tomatoes.  You've got all the elements here--tangy, sweet, salty, creamy and it just works.  It is perfect comfort food, and one of the few vegetarian meals that I find hearty enough to be satisfying as an entree.

What do I do with extra polenta? 
Keep any leftover polenta in the fridge and the next day it will be hard enough to pan fry, and delicious enough to eat for breakfast.  Cut it into slices, fry an egg and top with avocado and cheese.  Enjoy!

Sunday, May 22, 2011

Grandma's Triple Chocolate Chip Cookies

I know I haven't been posting recently--finals really have been crazy!  But just to give you a taste of all the delicious recipes I'm storing up, here are my grandma's triple chocolate chip cookies.  These cookies are simply amazing--a little bit crispy on the outside, and soft, gooey and brownie-like on the inside.  I've had maybe 10  5 today.  These were the perfect antidote to the stress I've been feeling before I begin the writing competition to end 1L!

Grandma's Triple Chocolate Cookies
What you'll need
3 oz unsweetened chocolate - chopped
1 1/2 C bittersweet chips
7 T butter
3 eggs room temp
1C sugar
 2t instant coffee
2t vanilla
 1/2C flour
1/2t baking powder
1/4t salt
1 1/2C semi sweet chips (or substitute milk chocolate chips)

 
Step 1
Melt the 3 oz chopped unsweetened chocolate, 1 1/2 C bittersweet chips, 7 T butter
together in a pan on low heat, and cool slightly 

Then, combine the 3 eggs and 1C sugar in a separate bowl and beat until thick and pale
Add 2t instant coffee and 2t vanilla  to the egg mixture

Stir together 1/2C flour, 1/2t baking powder, 1/4t salt and combine the egg mixture and the cooled chocolate mixture.  Stir in 1 1/2C semi sweet chips into mix. 
Cover with saran and let stand 25 min.  
As a side note, I have a weird thing against dark chocolate and so I used milk chocolate chips for this step and mine came out great as well.  

  Put oven racks at upper and lower middle positions and preheat oven to 350 degrees. Line baking sheets w/parchment or buttered tin foil. 
Put 1 heaping T batter 2" apart until the pan is full
Bake the cookies for 12 minutes, rotating sheets top to bottom and front to back halfway through. Cool on sheets.

Enjoy!